Are you noticing some clicking or popping noise while your vehicle is accelerating in turns? Maybe you should check the CV joints.
If you see dark grease splattered on the inside of the wheel rim and the drive wheel, then it might be time to replace it. Setting apart the price of a CV joint, even removing it from the axle, will cost you a fair bit of money.
Actually, removing it is not a complicated process. So, the smart thing to do is to learn how to remove CV joint from the axle by yourself.
And, this article is the perfect place to teach you that.
Table of Contents
- 1 What is a CV Joint?
- 2 Common CV Joint Problems
- 3 What Causes the Rubber Boot to Crack?
- 4 Removing CV Joint from Axle
- 5 Step 1: Safety First!
- 6 Step 2: Loosen the Axle Nut
- 7 Step 3: Raise the Vehicle
- 8 Step 4: Removing the Brake Caliper
- 9 Step 5: Disconnect the Tie Rod
- 10 Step 6: Disconnect the Strut Tower
- 11 Step 7: Loosen the CV Joint
- 12 Step 8: Removing the CV joint
- 13 Final Words
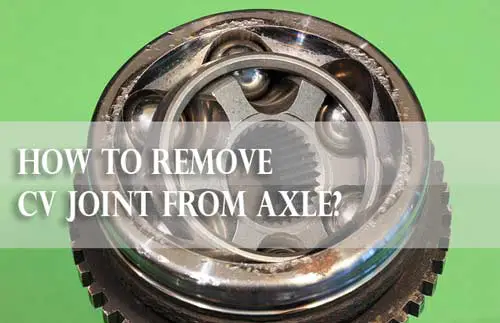
What is a CV Joint?
A CV joint is an abbreviation of the “Constant-velocity joint,” which allows the wheels to turn at a constant speed through a variable angle. It allows the driveshaft to transmit power without any appreciable increase in friction. Although they are mainly used in the front wheels, modern vehicles also use them at the rear wheels.
A typical CV joint includes a rubber boot and a CV gaiter filled with grease. The two most common types are ball-type and tripod-type CV joints.
There is a total of four CV joints at both ends of the drive shaft; two inner and two outer CV joints. You’ll find the ball-type on the outer and the tripod types on the inner CV joints.
The inner CV joint connects the shaft to the transmission, and the outer one allows movement between the shaft and the wheels.
Common CV Joint Problems
All CV joints are packed with molybdenum disulfide grease that helps keep the momentum of the vehicle constant without any friction. The grease is protected with the rubber boot, which usually doesn’t need any maintenance. But, sometimes there might occur some wear and tear on this rubber boot.
But whenever this protected boot develops any crack, contaminants like dirt gets in, and the grease or moisture comes out. Which causes the CV joint to wear faster.
The wear of the CV joint often takes the form of a small crack closer to the wheel. This means the outer joints develop more problems than the inner ones as they usually endure more vibration and movements.
What Causes the Rubber Boot to Crack?
Well, there is no single answer since the car goes through tons of adventures throughout its lifetime. Anything can damage the boot. But usually, external factors like stones, uneven or rocky paths, packed snow, etc., can damage it.
Removing CV Joint from Axle
Go through the following eight steps and help yourself to remove the CV joint from the axle yourself.
Step 1: Safety First!
Since you’re reading this article, we are assuming you are planning to remove the CV axle yourself. Before you do that, don’t forget to keep safety in mind.
We recommend wearing a decent pair of safety glasses and gloves throughout the entire process. Also, mind that the process is a bit messy. So, placing a towel or cardboard under your vehicle is also a good idea.
Additionally, don’t forget to choke the wheels before starting your work to prevent them from rolling. You can choke the wheels by putting something behind and in front of both the rear wheels.
And lastly, try to go through all the torque specifications on nuts and bolts to ensure you are not over or under-tightening anything.
Step 2: Loosen the Axle Nut
You need to raise the vehicle to open the wheels. But it is always a good idea to loosen the axle nut first while the wheels are still on the ground because this allows you to overcome the initial friction that keeps the wheels tight.
Start with removing the hubcap, or for vehicles with rims, simply remove the cap at the center of the wheel. Sometimes there is also a cotter pin on the axle nut that fastens it. Use pliers to remove that too.
Now comes the axle nut, which requires significant torque. That is why it is safer to loosen it before jacking up your car.
Step 3: Raise the Vehicle
Finally, it’s time to raise the vehicle. Find some strong part under the frame of the car’s body and roll your jack under it. Make sure to check if the parking brake is engaged before lifting it.
Raise your vehicle high enough to place the jack stand and ease the vehicle back down onto it. You can leave the jack under the vehicle so that it can also share some of the car’s weight.
Now since the axle nut has already been loosened, you can easily remove it without much torque. Also, remove the lug nuts in the same way you change the tire. Now the wheel will come off without even pulling.
Step 4: Removing the Brake Caliper
For McPhearson strut-equipped cars, it is not mandatory to remove the brake caliper or disconnect the tie rod. But if you’ve got other cars, then you might need to follow this step.
When you pull out the wheel, you’ll see the brake caliper and the brake rotor. This brake caliper is the big housing that is attached outside of the rotor. The caliper will be held to the rotor by bolts in a mounting bracket.
You need to remove this brake caliper by opening the bolts of the mounting bracket. The most common configuration of mounting brackets is usually 17mm bolts.
Step 5: Disconnect the Tie Rod
Just behind the rotor, you’ll notice the tie rod is bolted to the steering knuckle. Its bolt might be held with a cotter pin, which needs to be removed first. Using a needle nose plier can help with this.
If the tie rod is tightly snug in the steering knuckle, it is a good trick to penetrate lubricant, helping you easily remove both the pin and the bolt. Next, tap the threaded end with a wooden mallet. If the rod is still stuck, you might need to hit a bit harder. There is the possibility of damaging the threads so you need to be careful.
Step 6: Disconnect the Strut Tower
You’ll find two more bolts of 17mm that connect the wheel hub to the strut tower. Remove these two bolts and Mind that these bolts’ heads need to be secured first before loosening the nut, or else they’ll keep turning and won’t loosen.
Step 7: Loosen the CV Joint
When you’ve removed those two bolts, the hub connected by the axle through the center hole can be removed easily. With those two bolts gone, the whole assembly swings off with a little bit of push. You can use a hammer and a drift chisel after that to hit the end of the CV joint so that it becomes free.
Step 8: Removing the CV joint
At this stage, you need a prying tool to remove the CV joint. You can also use a flat screwdriver to loosen the band holding the boot. Other useful tools you could use are metal snips, pliers, and wire cutters. Cut the boot lengthwise and then discard it.
Final Words
Now that you know how to remove the CV joint from the axle, you can even replace it with a new one. Simply follow the process we’ve described in reverse order, and you’re good to go! But we’ll suggest you keep someone experienced at this by your side for added precaution.